 07-19-10, 11:34 PM
|
#1 |
|
BassFishin.Com Super Veteran

Join Date: Jul 2009
Location: Dallas,TX (DFW)
Posts: 2,212
|
As Im going crazy with nothing to work on..I decided to start a progression thread of a strip and rebuild or my first rod..(My Barlow's special) .A 7ft MH/fast...Its been a great rod, but as my first build it had alot of blemishes.....epoxy sags,epoxy not fully cured due to bad mixing...Using old/bad color preserver on metallic thread left it really splotchy...(You dont have to use CP on metallics I later found out)
And worst of all cork handles  .....hahahaha!....Im just kidding. .....hahahaha!....Im just kidding.Am I?  Anyway,I stripped the rod down to the blank...Guides,handles,and seat. Its not pictured yet...But I re-did the finish on the blank with 3 coats of permagloss....With the exception of the handle area that Im not done with yet...The blank looks brand new. The goal is to build a micro spiral wrap rod....After the test casting will see if I like it....If not,Ill go with the guides on all on top. Now Im just waiting for the components to arrive. Im also waiting on Barlows to return my email.....Im curious who made the blank.....Its not the greatest..I just wanna know. More to come. (I was gonna detail this out on how I stripped it.But its late..If asked I will gladly explain in full detail)
__________________
[nelsoncustomrods.com] Last edited by WaffleJaw; 07-19-10 at 11:51 PM. |

|

|
|
07-20-10, 12:28 AM
|
#2 |
|
BassFishin.Com Super Veteran

Join Date: Sep 2009
Location: Dallas, TX
Posts: 4,671
|
Very cool, I'm pretty anxious to see how this one turns out, for a few reasons.
The grips and reel seat seem like they would be a pain. You used a heat gun and steel wool to clean the old epoxy off? |
|
|
|
|
07-20-10, 09:59 AM
|
#3 | |
|
BassFishin.Com Super Veteran
Join Date: Jul 2009
Location: Dallas,TX (DFW)
Posts: 2,212
|
Quote:
Right. The cork grips take about 3 minutes to chew off...Real easy...I then use the heat gun on low heat and run it over small areas for about 3-5 seconds,and then use the side of a flathead screwdriver to scrap off more cork and epoxy...This just takes off the big leftover chunks. After that I use 150 grit to take it down more,then finegrit steelwool to finish it off.....I only do this on the reel seat /grip epoxy because it so strong.........I tried soaking this in boiling water.....Didnt soften a thing  ...I cant get it all off,but most of it. On the reel seat,I made two cuts with the dremel on both sides that you can see in the pic.This is so I can pry the trigger away and apply heat directly to the epoxy....It took several attempts to get it loose enough to twist off. (Its funny,I never did a front arbor on this seat  ) )On the actual thread finish (pictured)....I did the same low heat for 3-4 seconds and scrapped it off with the backside of a plastic pinic knife and my thumbnail..This way it wont scratch the graphite...Then lightly hit it with finegrit steel wool. Comes right off.Just have to be careful not to sand into the fibers. Once it was all off...I put the blank in the static tester and did a full bend on it to make sure I didnt make any weak spots by getting to excessive with the heat gun...Seriously it doesnt take more than a few seconds on thread finish.
__________________
[nelsoncustomrods.com] Last edited by WaffleJaw; 07-20-10 at 02:52 PM. |
|
|
|
|
|
07-20-10, 10:24 AM
|
#4 |
|
BassFishin.Com Super Veteran

Join Date: Jun 2009
Location: Bellevue, Ohio
Posts: 1,398
|
Good luck Waffle! I bet it will look great!
__________________
Tom |
|
|
|
|
07-20-10, 06:45 PM
|
#5 |
|
BassFishin.Com Premier Elite

Join Date: Jul 2006
Location: IN
Posts: 8,308
|
Good luck with your new project waffle. I wish I had the knowhow to do what your doing. I have an 8 1/2 foot trolling rod for lake Michigan fishin I'd love to remove the handle from and put on a casting handle instead. I do have to take issue with you about one thing though. Your title is very misleading and sucks the best of us into checkin it out, hahahaha.
|
|
|
|
|
07-20-10, 07:27 PM
|
#6 |
|
BassFishin.Com Super Veteran

Join Date: Apr 2005
Location: WA State
Posts: 1,783
|
Very cool! So is this going to be a "teaser" (st croix terminology) rod?
I hope you take us through the rebuild. I just might have to buy a heat gun.
__________________
ARX "If people concentrated on the really important things in life, there'd be a shortage of fishing poles." Doug Larson (Shimano 2005 Reel Catalog) |
|
|
|
|
07-20-10, 11:23 PM
|
#7 |
|
BassFishin.Com Super Veteran
Join Date: Jul 2009
Location: Dallas,TX (DFW)
Posts: 2,212
|
HAHA!..Keith I thought that was a brilliant title!....Its kinda like the band that named themselves ''free wings and beer'' lol....Misleading.
Man anytime you wanna take a stab at that trolling rod,let me know if I can help ya in anyway.....Handles really arent hard...But sometimes reel seats can take alot of work. IB I will try and do a complete walk through on this. Just waiting on freaking UPS. So in the mean time I running a test on a tiger wrap for it...I still wanna keep the purple and green theme....Its only right I feel 
__________________
[nelsoncustomrods.com] |
|
|
|
|
07-21-10, 10:01 AM
|
#8 |
|
BassFishin.Com Premier Elite

Join Date: Jul 2007
Location: Toledo, Ohio
Posts: 9,463
 |
Walker, looking good so far. Can't wait to see the build part!
BB
__________________
As of June 14, 2014 the members of the BF.com forum have moved to basschat.yuku.com! |
|
|
|
|
07-21-10, 12:35 PM
|
#9 |
|
BassFishin.Com Premier Elite

Join Date: Jan 2009
Location: Shawano, WI
Posts: 7,761
|
So far so good!
I'm real existed to see the final I took the fore grip off a rod a while ago, turned out good. Got the cork off all the way, with a knife, and some super fine grit sand paper. It does not have a good transition from where the fore grip was and where it was took. But it's much more balanced now!
__________________
If you can't fix it with heavy squats or fish oil, you're probably going to die. |
|
|
|
|
07-21-10, 01:28 PM
|
#10 |
|
BassFishin.Com Active Member

Join Date: Jul 2010
Location: Erie, Pa
Posts: 266
|
I didnt know you were a rod builder. Your work is amazing, after seeing a couple threads on other sites on rod building I think I found a project for winter.
|
|
|
|
|
07-21-10, 01:39 PM
|
#11 | |
|
BassFishin.Com Super Veteran
Join Date: Jul 2009
Location: Dallas,TX (DFW)
Posts: 2,212
|
Quote:
After Joe did his and I saw how good they look,it got me really interested in trying them...Ive always use winding checks,but its a pain to order them half the time to get them in the right size. Anyway the process Im gonna try is just building up and shaping flexcoat 5 minute epoxy to form the ramp..Then wrapping it in thread,then apply finish and hopefully end up with something like this 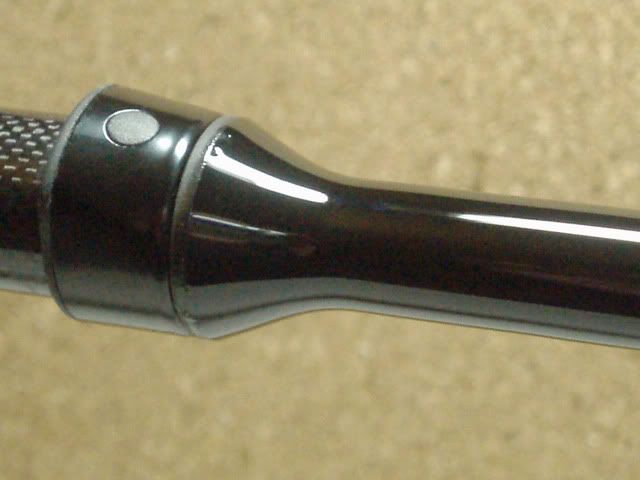 On this perticular one,the guy built up 5 minute epoxy,shaped it and then pigmented his thread finish with testor paint to match his blank..So he didnt use thread at all!.... Just another option available. Since Im planning on using thread over mine.Ill probably have to make the ramp longer to make thread go up easier. This is something that will be tested first before I apply it to the actual blank.
__________________
[nelsoncustomrods.com] Last edited by WaffleJaw; 07-21-10 at 01:46 PM. |
|
|
|
|
|
07-21-10, 02:25 PM
|
#12 |
|
BassFishin.Com Super Veteran
Join Date: Sep 2009
Location: Dallas, TX
Posts: 4,671
|
Just to add to what Walker said, epoxy ramps are really nice if done correctly. They make the rod flow visually with components really well and they are so much more comfortable than winding checks to rest fingers on.
I've only done them once and I used thread. I was really happy with how they turned out and I'm doing them again on the rod I'm working on now. I might even experiment with colored thread to get a different look. |
|
|
|
|
07-21-10, 02:35 PM
|
#13 | ||
|
BassFishin.Com Premier Elite
Join Date: Jan 2009
Location: Shawano, WI
Posts: 7,761
|
Quote:
Quote:
__________________
If you can't fix it with heavy squats or fish oil, you're probably going to die. |
||
|
|
|
|
07-21-10, 02:55 PM
|
#14 | |
|
BassFishin.Com Super Veteran
Join Date: Jul 2009
Location: Dallas,TX (DFW)
Posts: 2,212
|
Quote:
Then wrapping over it...then applying thread finish epoxy. Here read this...The beginning of this tutorial is what Im planning on doing...Only this guy sanded his. http://www.rodbuildingtutorials.com/.../SwellButt.pdf I also found out the blank is an CUI blank that I have. http://www.cuiproducts.com/Blanks.cfm Mine is the GC70MH model.....Good to know finally. Even though Ill never buy one again. 
__________________
[nelsoncustomrods.com] Last edited by WaffleJaw; 07-21-10 at 03:16 PM. |
|
|
|
|
|
07-21-10, 03:10 PM
|
#15 |
|
BassFishin.Com Super Veteran
Join Date: Sep 2009
Location: Dallas, TX
Posts: 4,671
|
Here's a couple of pics of the one I did. I wrapped black thread on top of itself to form a tapered ramp. I then used several coats of regular rod finish to make a smooth, finished ramp over the thread.
Nothing to take on or off, just wrap thread around the blank and epoxy. What Walker is talking about is basically the same thing only no thread is used. Different techniques to get the same result. |
|
|
|
|
07-21-10, 11:28 PM
|
#16 |
|
BassFishin.Com Super Veteran
Join Date: Jul 2009
Location: Dallas,TX (DFW)
Posts: 2,212
|
Well I got into some testing tonight...Talking about the epoxy ramps above, I wanted to try it..I had an old Berkley rod that I test on,so it seemed to be a good choice.
I mixed up the two parts of Flex-coat 5 minute epoxy (about nickel size each part) and started the first layer of epoxy...I put the rod on the dryer motor and while turning applied it with stirring sticks..Build up at the seat and shaped it towards the blank.....Waited 10 minutes and did the 2nd coat the same way only making sure I pushed the epoxy to touch the edge of the reel seat...I dont wanna build it all the way..Gotta leave room for thread and thread finish....But this is where you see the ramp taking shape...Turning on the dryer will help level it out...Some people tilt them,but I left it level. So while the epoxy was still a bit soft I did a quick wrap to see the outcome..I probably should have waited a for it to set up more,but it wasnt too bad.Just a little soft,but that helps the thread climb the ramp. Not too bad!! The second picture are two different underwraps Im doing for the tigerwrap...Im still wanting to keep the green/purple colors...So 1 underwrap is charcoal and purple wrap together,then epoxied,then tomorrow Ill do the over wrap with spring green. The 2nd one is reversed...so spring green and charcoal,then Ill do purple on top once the epoxy cures...To see which one I like best. On tiger underwraps ,You usually need a contrast color...Im curious to see how the purple and charcoal works...If at all?..It may be to dark. The very first part of that picture is the tool I use on burnishing tigerwraps...Burnishing, in rodbuilding, typically means to rub a smooth object over the thread to straighten them out and packed them together nice and tight with no gaps.....Now when people refer to burnishing a tigerwrap,Most likely they mean sending the thread in different directions to obtain the effect. So I burnish the wrap tight and smooth with my burnishing tool...Then use the pictured tool to burnish the thread in different directions...Basically just rotate the rod by hand and slide that stainless steel tip across the thread in abstract patterns..The skys the limit on it! The key is to do these wraps somewhat loose!..The ends are tight,but when I add the 2nd color of thread,I back off alot of tension on the thread jig,and wrap the ''effect area'' loose...I think I use 1/2 to 1 1/2 turns of tension on the thread jig if that helps...You pack tight as you go with your thumbnail and burnishing tool to avoid gaps. If you look at the picture..You'll see the thread is not straight,but slightly wavy...From far away,you can kinda already see the effect. So anyway,there drying tonight.I will hopefully do the overwraps tomorrow and see what kinda mess I made
__________________
[nelsoncustomrods.com] |
|
|
|
|
07-21-10, 11:31 PM
|
#17 |
|
BassFishin.Com Active Member
Join Date: Jul 2010
Location: Erie, Pa
Posts: 266
|
Those epoxy ramps are clean looking. They add a nice touch to the rod IMO.
|
|
|
|
|
07-22-10, 12:03 AM
|
#18 |
|
BassFishin.Com Super Veteran
Join Date: Sep 2009
Location: Dallas, TX
Posts: 4,671
|
That's going to work out great! Are you going to keep the tigers at 2 layers?
It would be cool if you could do some kind of base wrap under the epoxy and just use finish over the top. The bubbles would definitely prevent that though. |
|
|
|
|
07-22-10, 11:42 AM
|
#19 | |
|
BassFishin.Com Super Veteran
Join Date: Jul 2009
Location: Dallas,TX (DFW)
Posts: 2,212
|
Quote:
__________________
[nelsoncustomrods.com] |
|
|
|
|
|
07-22-10, 02:05 PM
|
#20 |
|
BassFishin.Com Active Member
Join Date: Apr 2010
Location: Lakehills, Tx
Posts: 185
|
Waffle...Will the added epoxy used to make the ramps add much weight to the rod? Really curious how the micros will perform in a spiral wrap. Please, keep us updated.
|
|
|
|
|
07-22-10, 02:50 PM
|
#21 | |
|
BassFishin.Com Super Veteran
Join Date: Jul 2009
Location: Dallas,TX (DFW)
Posts: 2,212
|
Quote:
Im very curious about the micro spiral too...I been talking about doing one for awhile so Im pretty excited to test it...I did alooooot of research on it. And alot of guys swear they wont build any other way for themselves. Will see?...Im hoping the get the handle done over the weekend and start mocking up the guides for test casting next week.
__________________
[nelsoncustomrods.com] |
|
|
|
|
|
07-23-10, 09:37 AM
|
#22 |
|
BassFishin.Com Super Veteran
Join Date: Jul 2009
Location: Dallas,TX (DFW)
Posts: 2,212
|
Finished up the testing last night....The tiger underwrap with purple and charcoal wasnt very good...There wasnt enough contrast which is what I was afraid of.....The other looks really cool..not sure if Im gonna run with it though
 ...I like it,but I dont know yet. ...I like it,but I dont know yet.The pics show the progression of doing the overwrap...I started with purple which is my main color (size A)....Then added the orange thread which will be my sacrifical thread (the thread we will remove) The orange is size D..I wanted a wider spacing inbetween the purple to let more green show through from below.I also took picutures of my regular burnishing tool to pack the thread(which is just a circuit tester that I hit with steelwool),and then again of my tiger burnishing tool that I do next. Once I unwind the sacrifical thread off (my favorite part )..I do a coat of color preserver (not pictured) let that dry,then a coat of thread finsih to even further the moire effect of the tiger.The pictures add more lines than there really is...But it looks really sweet in person. Im also working on a new grip inlay with lime green foam to match the green thread....So far,so good...I was scared it wouldnt sand smooth,but so far its great! Im think Im done testing???...I hate it when I cant edit stuff ")
__________________
[nelsoncustomrods.com] |
|
|
|
|
07-23-10, 09:45 AM
|
#23 | |
|
BassFishin.Com Super Veteran
Join Date: Sep 2009
Location: Dallas, TX
Posts: 4,671
|
Quote:
|
|
|
|
|
|
07-23-10, 09:50 AM
|
#24 |
|
BassFishin.Com Super Veteran
Join Date: Sep 2009
Location: Dallas, TX
Posts: 4,671
|
I think those inlays look sweet Walker! I like the one big and one small circle pattern like that. Like I said before, I'm really excited to see this rod once it's completed, both for aesthetic reasons and performance! How bad did your thread sink in the epoxy on the tiger over wrap?
|
|
|
|
|
07-23-10, 10:03 AM
|
#25 | |
|
BassFishin.Com Super Veteran
Join Date: Jul 2009
Location: Dallas,TX (DFW)
Posts: 2,212
|
Quote:
haha,Thread didnt sink in at all...It had a good 20 hours to set up Plus it was a ultra thin layer of finish...On the actual rod Ill do two layers and make this mother pop!! I brought that grip with me to show you when we go fish after work. The only thing Im scared of is this rod being too loud as far as color!!....Well see if I can execute well and tame this beast properly,hahaha!
__________________
[nelsoncustomrods.com] |
|
|
|
|
 |
|
Disclosure / Disclaimer
Before acting on the content posted, you should know that BassFishin.Com may benefit financially and otherwise from content, advertising, links or otherwise from anything you click on, read, or look at on our website. Click here to read our Disclosure Policy and Disclaimer. |
| Currently Active Users Viewing This Thread: 1 (0 members and 1 guests) | |
|
|


 Linear Mode

