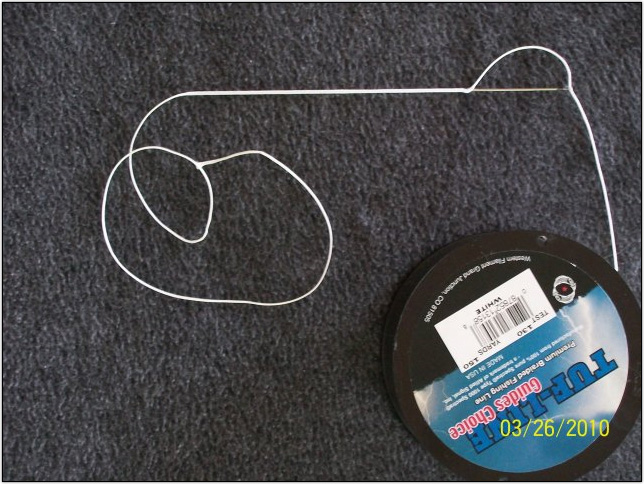
Introducing Hollow Core Braid For Bass Fishing
Published March 31, 2010 by Garry Thornton
Fluorocarbon, monofilament and braided lines each have their own advantages and disadvantages. Each differs in handling, visibility, buoyancy and stretch (to name a few). As savvy anglers, we are forced to continually switch line types depending on which best suits a specific presentation, condition or lure.
Wouldn’t it be nice if there was a line that combined the advantages and qualities of all three types?
It appeared to me that the true answer to this fisherman’s prayer would have to be a merging of all three line types. The easy way to this Nirvana might be as simple as using braid, for it’s small diameter and strength, as a running line and then tying on a leader of either mono or fluorocarbon, depending upon the application.
However, attaching leaders has always involved knots.
The leaders would either have to be short enough to stay outside the tip guide or their knots would bang and rattle their way off the rod, on every cast, stealing distance.
Now, what if it were possible to join the leader to the line without a knot?
In the Fall of 2008 I saw a video on-line, where a man in fact did join a Fluorocarbon leader to a running line of Hollow-Core braid.
The method was absurdly simple…
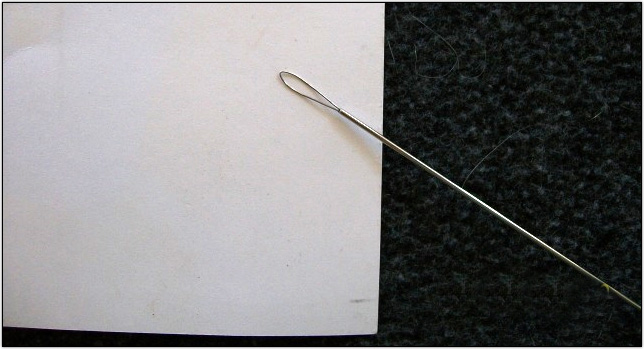
Using a hollow needle he inserted the leader material into the “hollow core” of the braided line.
The leaders, he said, would be trapped inside the braid by the weave closing down upon it like those “Chinese Handcuffs” or “Finger Traps” that I can remember getting as prizes at County Fairs and Carnivals.
Was this, at last the “Holy Grail?” Or was it just too-good-to-be-true?
Excitedly, I contacted the store who’s name was associated with the video…
What I learned was disappointing…
First of all, the lines that were featured in the video were imported from Japan and were terribly expensive. I was quoted nearly $90.00 for 100 yards of 50 pound test. Secondly this 50 pound test was the lightest weight available.
Now granted, fifty pound test braid is generally only about the diameter of 12 pound mono/fluoro, but even as I was rationalizing the fifty pound test line, another setback arose…
I was informed that the smallest hollow needle (the tool used to thread the leader material into the braided line), was for 50 pound test leaders! This meant that lightest braided line that could actually be threaded was about 80 pound test! I might be able to make Musky leaders but not anything that would be useful for Bass.
More Concerns…
I had other concerns about the nature of the line as well. In the past I have tried many different braids. Some were tightly woven and others were quite loose.
- If this line was braided so that it was hollow, did that mean that the line was larger in diameter than “solid” braid of the same test?
- What about the tightness of the weave? If this was designed to have a leader stuffed inside, was it a slack and sloppy weave that would snag on every hook in the boat?
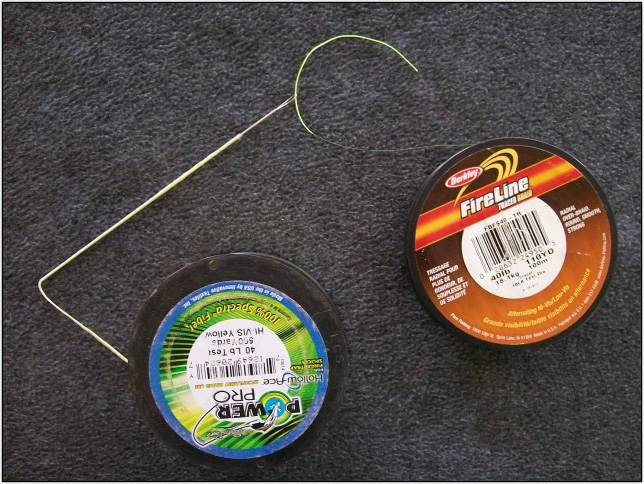
The First Hollow-Core Braid Experience: Jerry Brown Industries
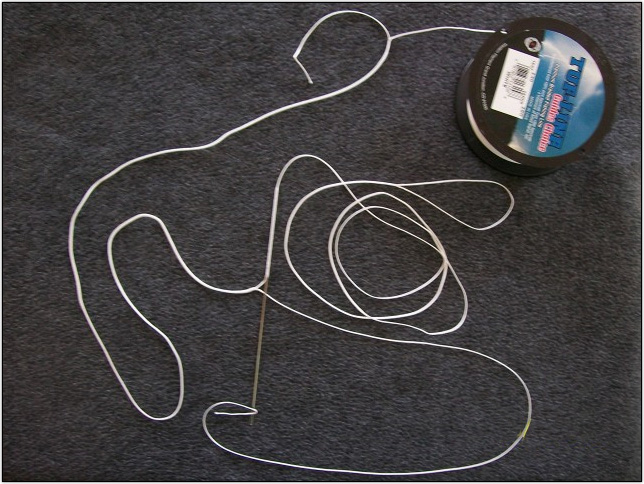
Before I left Arizona for my summer in Canada I acquired some samples of hollow-core braid from Jerry Brown Industries in Gold Hill Oregon (541-855-7127).
Mr Brown, who just might be the father of Spectra fishing line, also gave me the name of a company, DaHo Products (www.dahoproducts.com) whom, he said, could provide the tools I would need to make knotless leaders.
I spent the next six month fishing up north with Jerry Brown’s Line One hollow braid.
The line was very nice to use.
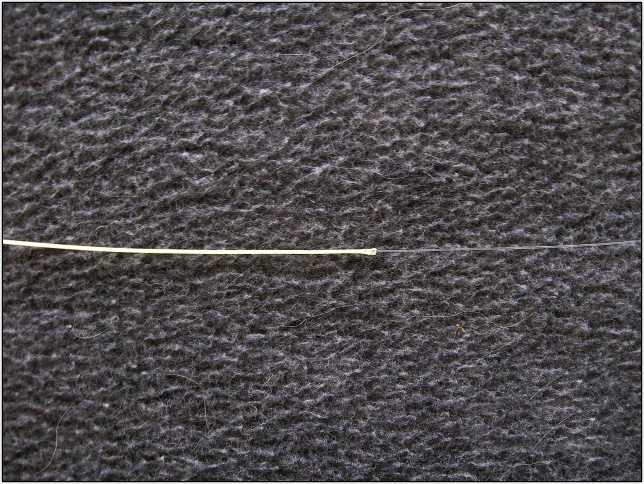
It’s at least a 16 strand braid so it is very round and has an almost silky feel. There was no “hole” in the middle of the line, and the weave was as tight as the best “solid” braids I have ever used.
Quest To Find Proper Tools For Threading Leaders
Returning to Yuma, Arizona in the Fall of 2009, I was anxious to acquire the tools needed for threading leaders. When I phoned DaHo, I found out that they are only a manufacturer. They directed me to the list of dealers on their web-site.
Luckily for me the one I called was Brett Honza at Northwest Topshots in Elmira Oregon (541-935-8108 or e-mail nwts@northwesttopshots.com). Brett is a retailer of various braided hollow core Spectra lines, leader materials and tools. He has even put together a complete kit with everything needed to go into business making these leaders etc. Brett also sells ready made leaders to the hundreds of Saltwater Fishermen who have been using this system for many years. He is very knowledgeable and was willing to spend time answering my questions.
New Developments In Hollow-Core For Bass Fishermen
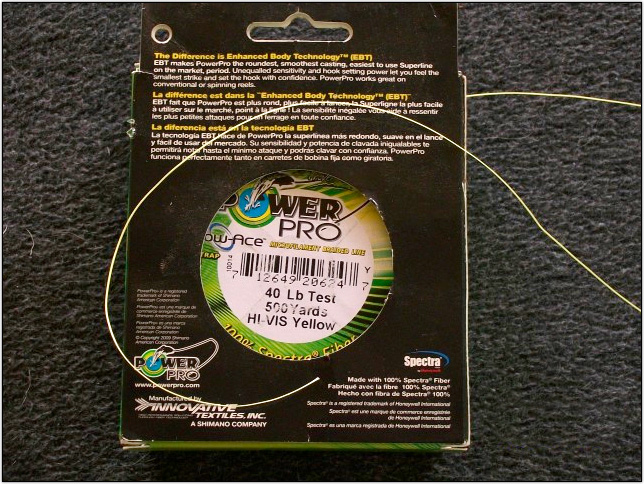
The really Lucky part for me came when I explained I was primarily a Bass fisherman but only planned to make Musky leaders, since there was no light line and tools available. Brett then made me aware of some new developments. He told me that there was a new 40 pound hollow core line being made by Power Pro.
This family of lines were called Hollow Ace, and it wasn’t quite on the market yet. Brett had some pre-production samples to test. He had been able to thread leaders as light as 12 pound test, into the 40# using a custom made DaHo Needle rated for 20 pound mono.
Locating The New Hollow Ace
A call to Shimano, led me to someone at Innovative Textiles Inc., who makes Power Pro. They said that the shipping of Hollow Ace had now started and that the closest stores, to me, would be in San Diego, CA.
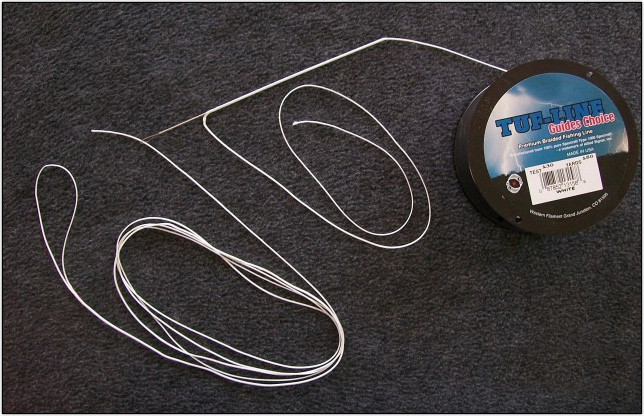
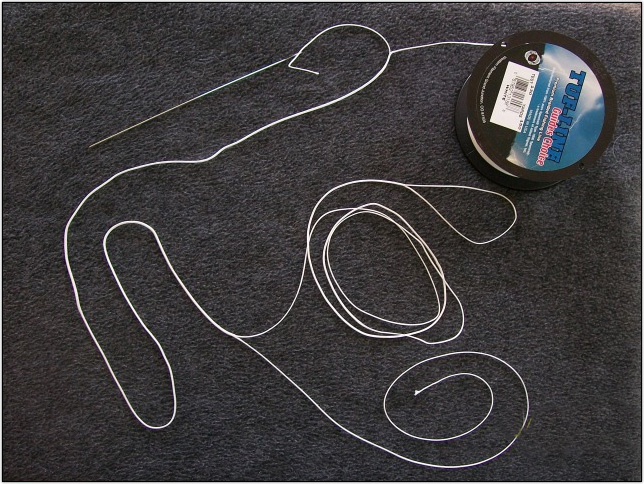
It took a few calls to locate a spool of Hollow Ace in 40# test, but I was able to buy 500 yards for $99.99. This is more than standard solid Power Pro, and more than other hollow core lines in heavier weights, but much less than the Japanese line.
I acquired all the other supplies I would need from Brett at Northwest Topshots.
Power Pro Hollow Ace: First Impressions
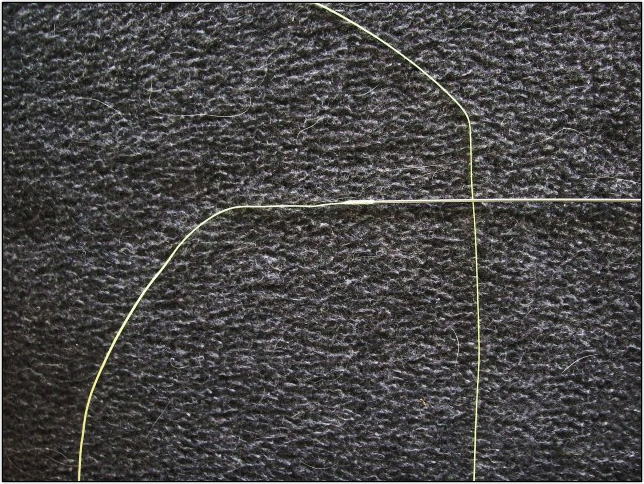
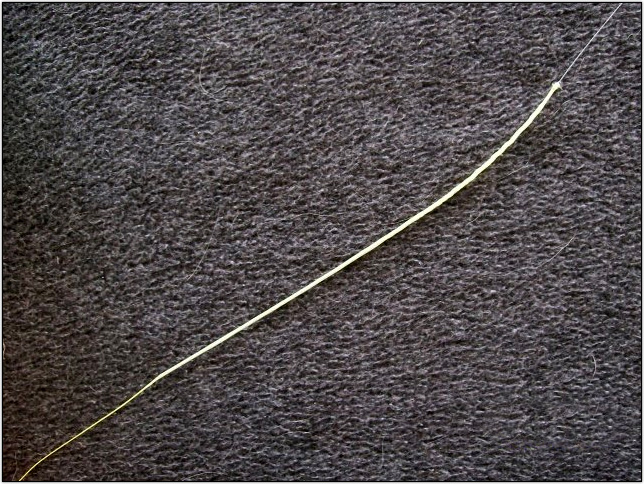
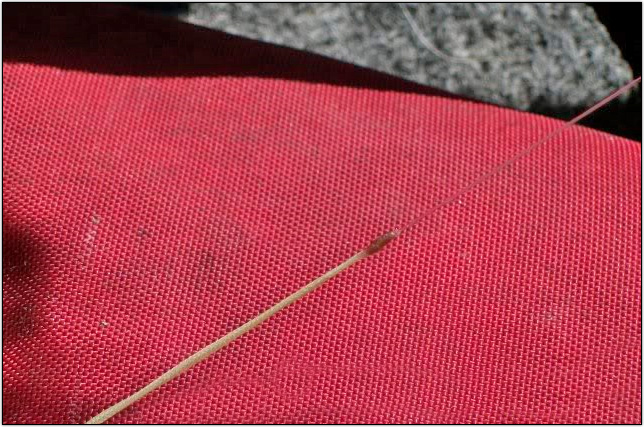
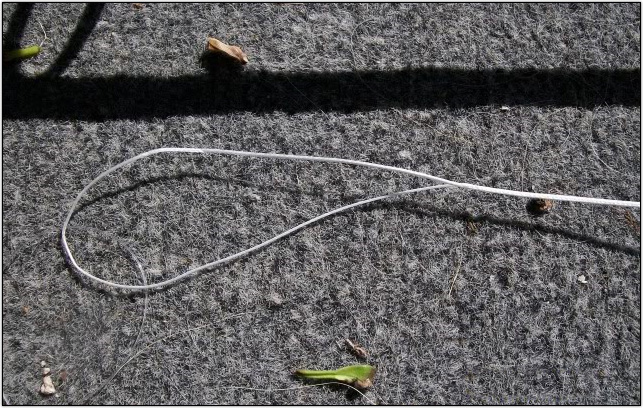
The 40# Hollow Ace is a very small diameter line. It is also a 16 strand braid, round and smooth to the touch. It spools up very nicely and casts like a dream.
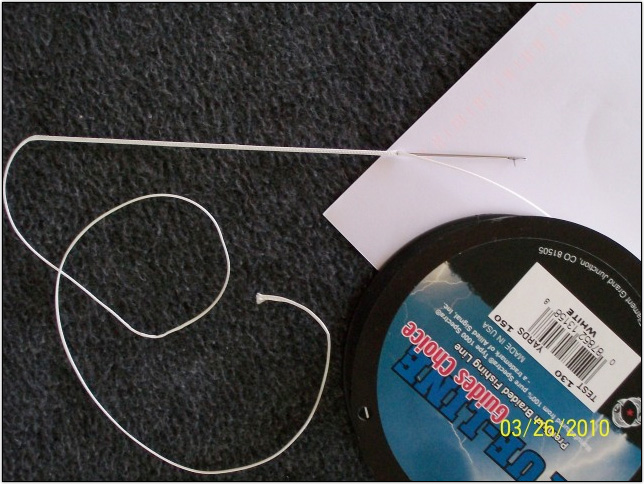
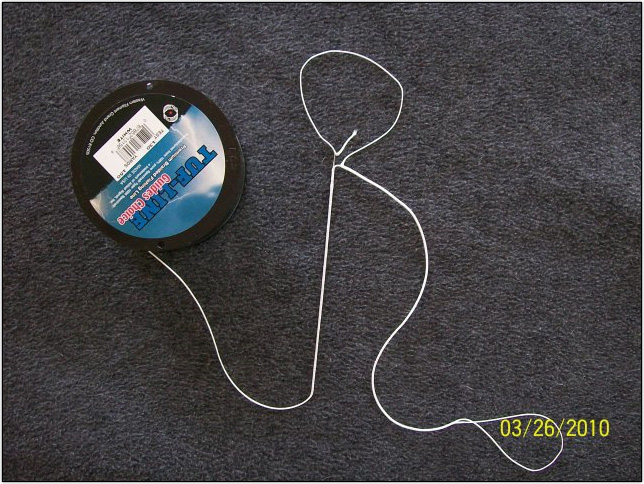
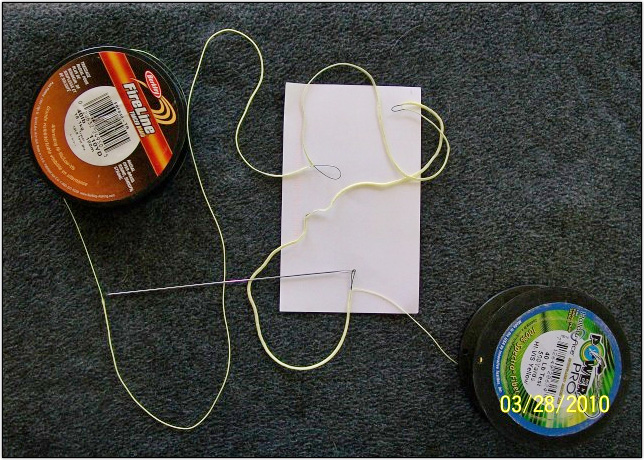
Making My First Leader
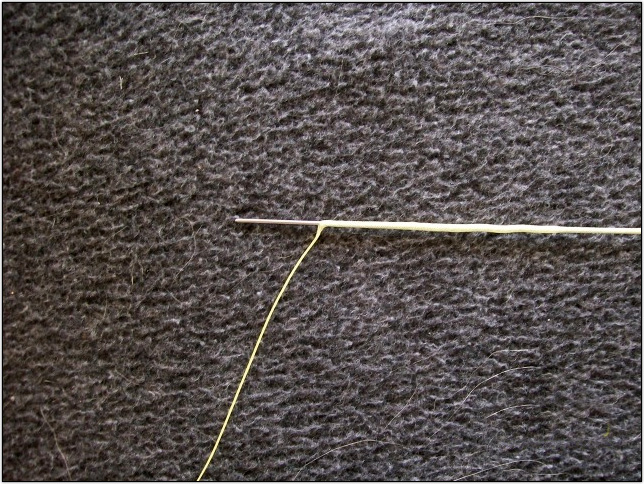
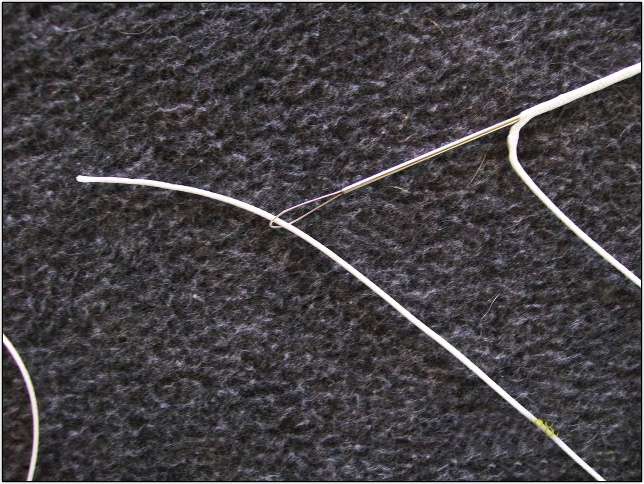
To make my first leader I used 15 pound Fluorocarbon.
I had to bend some kinks into this undersized leader material to get enough friction to keep it inside the slightly larger 20# needle.
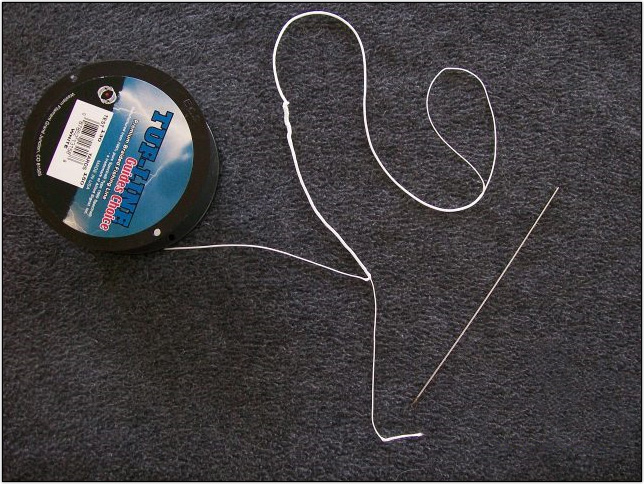
The needles are blunt, so that they don’t snag the tiny Spectra fibers.
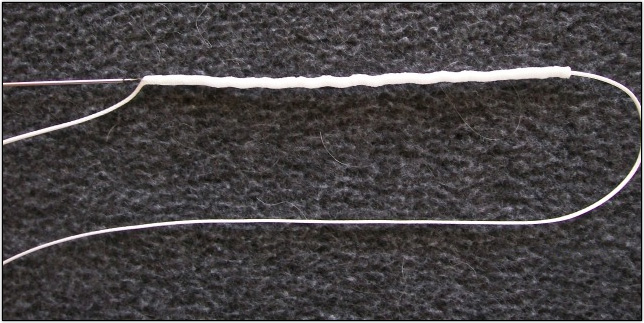
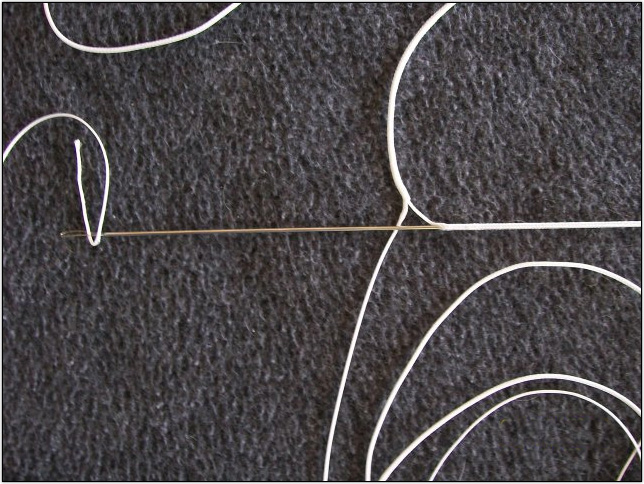
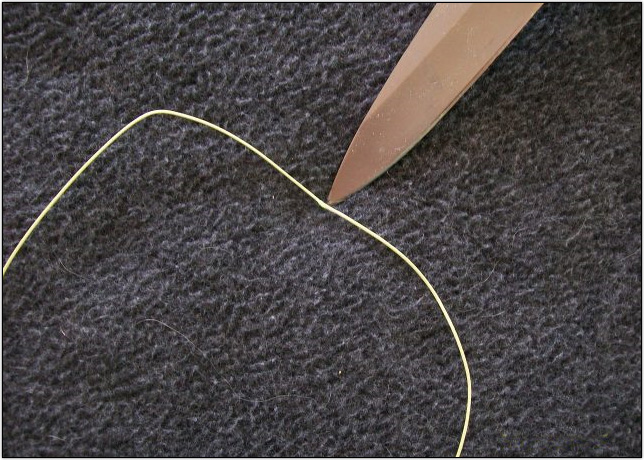
Starting the 20# needle into 40# Hollow Ace braid requires some patience and a light touch. However, even for my 65 year old fingers and eyes it was no harder than tying on a small fly (*grin*).
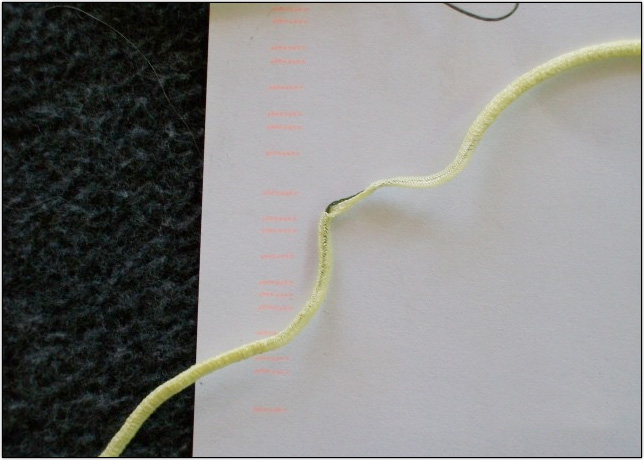
Notice how the braid bulges around the needle…
Once started, the needle passed quite easily through the braid. It’s sort of an Inch Worm sort of thing, where the line is eased up onto the needle. This expands the braid, which then can be compacted and accordioned up until the needle is so full you have to let some slide off the back end and down the leader material…
The weave of the line stays loose until you completely smooth it out again, so it doesn’t tighten down on the leader while you are working. The relaxed line slips easily off the back of the needle and flows along the leader material…

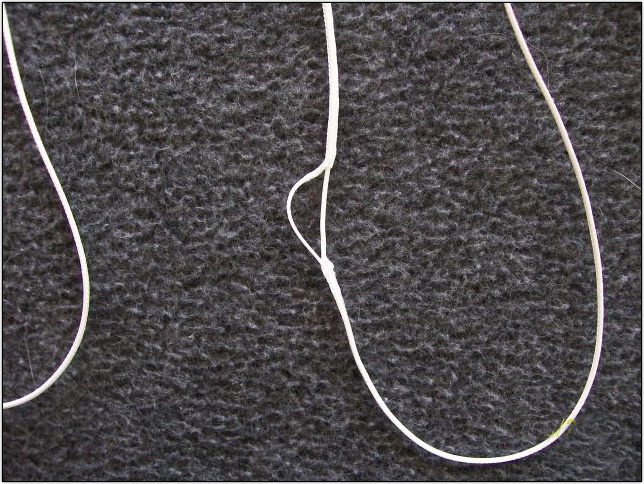
Once the leader is about three feet inside the braided line, you bring the needle out through the weave and remove it.
Holding the tag of leader, you smooth the braid down over the leader all the way to the end. This will re-tighten the weave, finger trapping the leader material securely inside the line.
After this first re-tightening you will release the tag end of the leader, and on subsequent tightening passes it will simply disappear back into the braid. If it didn’t, you would just snip it off.
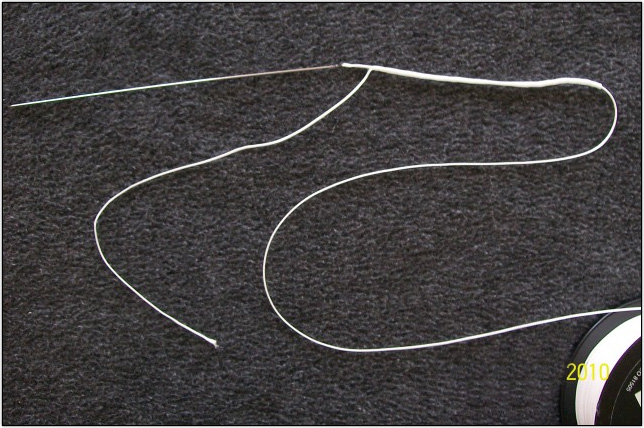
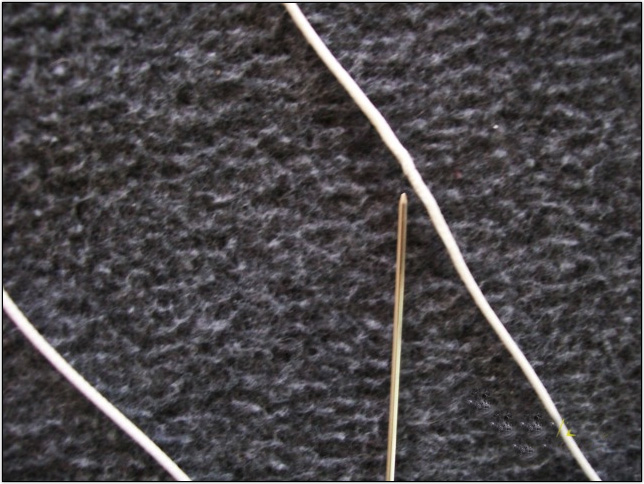
The needle emerges…
Bringing the tag end of the leader with it…

Smoothing the braid toward the leader re-tightens the weave…
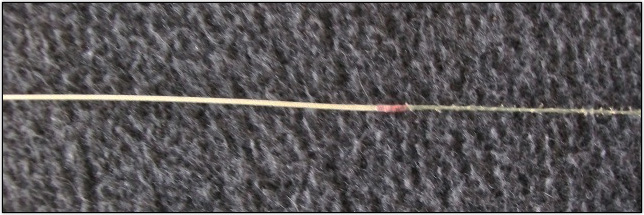
To hold the braid tight to the leader forever, and to keep the raw end of the braid from unraveling, a small nail-knot is tied on top of the joint using light weight Spectra. This is ten pound Power Pro, the knot is then glued.
You can see that the braid is not completely tight yet. It will require one more smoothing pass toward the reel to reach 100%.
This knot doesn’t hold the leader in place. It just keeps the braid from sliding up the leader if there where no tension to activate the finger lock.
Demons…
Looking back, there were two things I struggled to accept…
Finger traps and loop-to-loop.
Both were totally irrational. If these joints are strong enough for Tuna fishermen, I had no cause to doubt them.
Testing The Strength Of The Finger Lock
Still the “Doubting Thomas” in me made me test the strength of the finger lock.
I put all my weight on an 80 pound braided line with a 50 pound leader.
There was nothing holding the two lines together but the invisible force of the finger trap.. And nothing moved!
I tested it again on the water. When I pulled hard enough to break the 15 pound fluorocarbon, it broke at the knot that attached the lure to the leader.
These Style Leaders Are “Top Shots”
These first leaders that I made and described to you were what I call “Top Shots.” By that I mean the line was inserted straight into the running line on the reel.
The advantage of this joint is that it is very small and casts like a rocket. The disadvantage is that if you break it off, that reel is retired until you can sit down and thread a new leader. This isn’t something I would want to do out on the boat.
The Other Way (Loop-To-Loop)…
The next family of leaders is made exactly the same way, however the braided line has a loop formed in the end and the line from the reel has a matching loop. The two loops interlock to form a square knot, which all you Boy Scouts will remember is both very strong and tiny.
Does The Loop-To-Loop Cast Well?
Before I show you how the loop is formed, let me talk about casting with this loop-to-loop joint…
The two joints are completely smooth. There are no knots! The casts are so smooth going out that you honestly don’t know it’s not all one line.
The New Knotless Loop-To-Loop Models Are The Only Way To Go…
So my second problem was that the experts told me loop-to-loop was the way to go, but I had used the “old” knotted loop-to-loop joints… And they were bad.
If you used them too, you will just have to believe me until you get to try one of these knotless models. I swear this is a buttery smooth joint that flies out of the guides seamlessly. It is the method that I will be using from now on.
Loop-to-loop leaders…
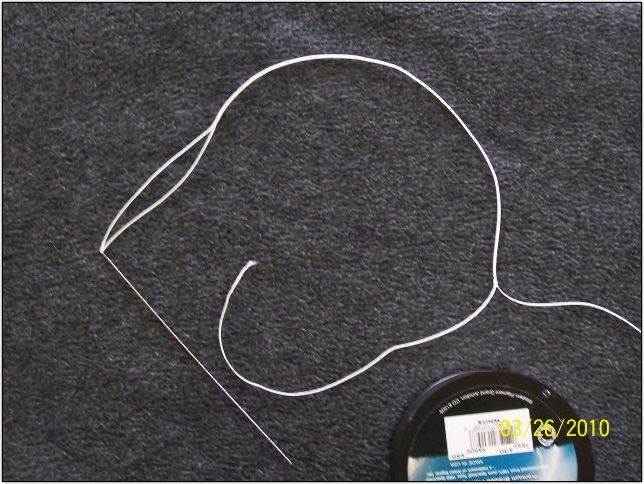
To form the loop, a Reverse Latch Needle is inserted into the line about two feet above the tag end.
The needle faces away from the spool, so it will be traveling toward the tag end for about twelve inches. You will then catch the running line with the latch and pull a loop of line right through that 12 inches of line. This will form the loop.
The over line will be worked back over itself, turning it inside out and the tag end will be threaded inside of the running line in the direction of the spool, to finish it all off neatly.
Let’s Get Started
The “Latch…”
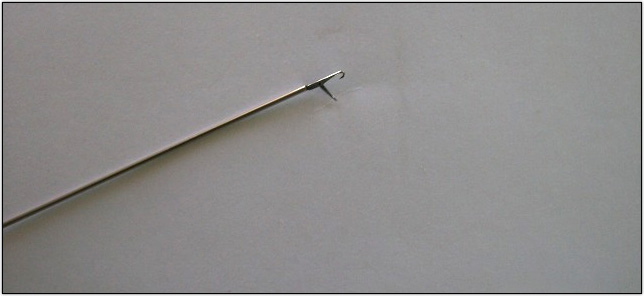
Insert the needle into the line about 12 inches…the needle is traveling toward the tag end.
Catch the running line in the latch, about as far up the line as the size you want the finished loop to be. In this case, about 3 inches.
Notice the way the needle makes the line look swollen.
About 12 inches from the end of the line, bring the needle out through the weave, and with one smooth motion slide the compacted line up over the latch so that the latch and its attached loop are pulled completely through the outer line in one move.

Detail of compacted line as the latch emerges…
Now we see the Loop emerging…
The compacted line is smoothed backward until it turns itself inside out.
At this point the loop has been completely pulled through. The outer line is still a little compacted and bunched.
By gently stroking this line it will now slide down and tighten as it turns inside-out.
The latch needle is removed from the loop and threaded into the mainline about 1/2 inch away from the point where you started.
We are going to tuck in the loose end now. This time the needle is going toward the spool…
Once again the line is compacted and bunched up on the needle…
Then the tag end is pulled through in one shot and the latch needle removed…
The over-line is once again smoothed out, and the tag end either disappears inside or is snipped off…
Moving On: Adding Versatility and Ease of Replacement
So we’ve joined a piece of Fluorocarbon or Monofilament leader material, knotlessly and directly to our braided Hollow Core main line. This is a great leap forward, but if the leader was damaged that reel might be out of service until we could insert another leader back at home.
To provide more versatility we used the reverse latch needle, to create a loop in the end of our hollow core main line and a matching loop in a section of braided leader.
By inserting our Fluoro or Mono into this looped leader, instead of the main line, we made changing leaders as easy as connecting or disconnecting the two loops.
Huge Bonus!
Here is a huge bonus…
If the main line were ever damaged or showing its age, a brand new section could be seamlessly spliced onto the remaining old main line, while maintaining 100% line strength!
Making The Line-To-Line Splice
To make a line-to-line-splice, either the reverse latch needle can be used again, or a loop-splicing needle could be used. The loop-splicing needle is a hollow threading needle with a loop of fine piano wire soldered inside the open end…
In order to splice the two pieces of line together the needle is first inserted about three feet from the tag end of the old line pointing toward the spool.
Note that the reel (or in this case the spool) is to the right. The new line with a new looped end is to the left. The needle is traveling toward the spool…
Detail…
The tag end of the new line is inserted in the wire loop (or latch)… And the needle, together with the new line, are threaded inside of the old line for a distance of about two or three feet.
The needle then comes out through the braid, exactly as we have done before, and the old line is smoothed down.
The pictures will go a little faster this time since the techniques aren’t really new to you anymore.
At the top of the frame the tag end of the new line has emerged from the old line. To the left is the doubled first half of the splice.
At the bottom of the frame the tag end of the old line awaits our attention.
The needle is now reinserted into the new line about half an inch away from the spot where it entered the old line. The tag end of the old line now goes into the wire loop (or latch), and it will be threaded inside the new line for about three feet.
Detail…
As before, the needle and line go through the host line and exit three feet away….

Note the space where the splice started. This will vanish as the two lines are tightened and smoothed out…
After the lines are tightened any visible tag ends are snipped off. Usually they just disappear back inside the splice as it is smoothed and tightened. We left them out for the picture to make it clearer what had been done.
As the lines are worked-out, the two entrance holes will be drawn together until the two lines become one. The needle point indicates the exact spot where the two sections were joined…
Once again, this joint is 100% of the original line strength!
Joining Solid Braid to Hollow Braid…
In time we might switch all our reels over to hollow core braided line. Since it is spliceable and it never rots this might be the last time we will ever need to completely fill the reels!
However, to get started it is possible to splice a new piece of hollow core onto our old solid braid line. In order to use the loop-to-loop leader system we would start by creating a loop on the end of about eight feet of hollow core line. We will then attach the raw end of that line to the solid line.
We will thread the solid line from the reel into the hollow leader line. For this splice we will again use the reverse latch or the loop-splicing needle.
For the pictures we will splice a spool of 40-pound Power Pro Hollow Ace to a spool of 40 pound Fireline Tracer…
In real life we would have a loop in the hollow core like this…
Obviously while making this splice we only have the hollow line, that will make our finger lock, in one direction. Therefore we will thread the solid line about four feet inside the hollow core line.
We will also create a series of tiny safety locks by bringing the solid line out through the hollow braid after one foot, then re-inserting it a fraction of an inch farther up the hollow line. In total we will do this three times, in four feet, to create six safety locks.
Notice there are three places were the solid Tracer line is coming out and going back into the hollow core line…
Detail…
When the hollow line is re-tightened, the safety locks all but disappear.
The tightened lock is at the knife point…
To finish the splice we will smooth everything out and tie a nail knot on the joint, just like on the leaders…
Final Thoughts…
All that’s new here is that we have used down-sized lines and tools to reduce tried and true saltwater line and leader systems, to freshwater proportions. There is nothing experimental about these techniques. All are well known and thoroughly tested.
In saltwater Ports, like San Diego, most tackle shops provide “Rigging” services. Someone buying a new reel could have that reel spooled-up with hollow core line by the tackle store, perhaps as part of the purchase.
These stores will create a loop on the end of the line as part of their service. As we know, if the loop or running line should ever be damaged, the line can easily be spliced.
Not everyone reading this will want to buy needles and tools to do this themselves. In fact I’m sure that many saltwater anglers will likewise never make their own loops or leaders. These anglers will use leaders that they purchase in local tackle shops or from on-line dealers, who not only sell standard size leaders but will custom make leaders to their customer’s specifications.
As far as I know, these services don’t generally exist for freshwater fishermen, other than on the West Coast. I know that my mentor, Brett, has some freshwater clients and perhaps anyone interested in these ideas, without the labor pains, might want to contact him at Northwest Topshots (541-935-8108).
Walleye, Pike and Musky anglers could benefit from “light” saltwater lines and leaders that already exist, but coast-to-coast the USA is a Bass fishing nation.
Now that there is some hollow line, suitable for Bass size casting rods, all that is needed to get this idea off the ground is some education of the public to create the interest and demand. With that demand, in the near future there’s no reason that even small “spinning rod size lines” could not be made.
If these lines were too small to be threaded by hand, perhaps pre-formed end loops could be made right in the factory. This is already done on some fly lines. That would allow line makers to create and sell tiny knotless loop-to-loop leaders…
~ Garry Thornton